RongHua Ching

Chinese style braised oxtail bones – recipe

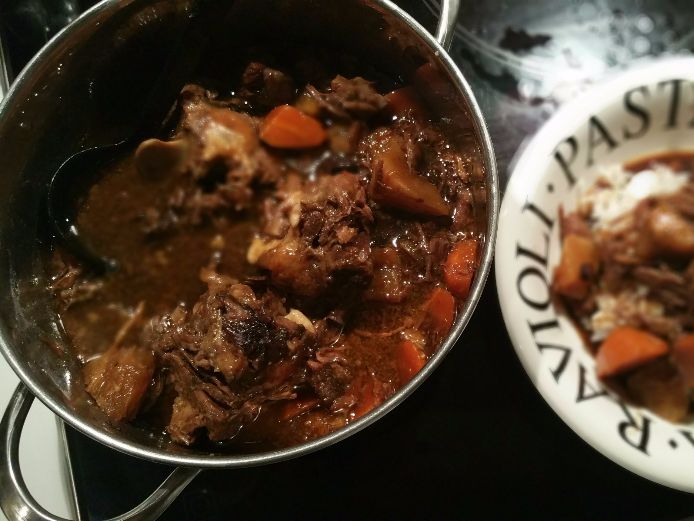
Chinese style braised oxtail bones are served as a topping on rice or served separately in a wide bowl. Vegetables as carrots and cassava are added making this dish a hearty and flavoursome nutritious dish. Paleo fans will enjoy its warming earthiness as much without any gluten ingredients. Interchanging between a variety of bean sauces (Chinese fermented soybean sauces), chilli paste and spices will allow you to play with an aroma to your own liking. Or be adventurous and choose to cook from other south-east Asian cuisines enjoying the different flavour, texture with salivating fragrances.

Serve in a bowl by itself with rice or noodles on the side, or topped above as a one-dish meal for lunch or dinner. As a main dish, if preparing a menu for more persons, I would suggest adding a vegetable- and doufu dish with a light soup to complement each other. The Chinese style braised oxtail bones will be the focus for your guests at the table. For the recipe scroll here below, click here for Chinese braised oxtail in Instant Pot information and photo images.

Difference between braise, stews and soup – Update 21 December 2015

I received engaging comments with the questions, how much liquid to add. Followed by the difference between braising and stews. In answer to my readers,  I am updating the post with the replied information on the method of cooking techniques used for tougher cuts of meat.

To start with the liquid in any recipe, it focuses on the right volume to add, water, stock or broth. Next, the cut size of the meat (small cubes) and cutting against the grain means cutting crosswise through the long muscle fibres in the meat. Breaking them up makes meat more tender.

Often used cuts are the less tender and gelatinous parts of meat for slow cooking as well as the use of accompanying vegetables in the dish. In order to fuse all the ingredients together to melt into a tender and flavoursome dish, is by breaking down the connective tissue as tendons (collagen) just simmering it slowly using the right low temperature.

Braising and stewing cooking technique are combination cooking methods using the hob and/or oven.

  • Braising is cooking meat on a bed of vegetables in a small amount of liquid, utilising steam and stewing in its cooking process. At the end of the cooking process, the meat often falls off the bone and the concentrated gravy is clinging to the pieces of meat.
  • Stewing is a slow cook method, where the food is cut into smaller pieces and covered in liquid using gentle heat for a long time. Here the meat is fork tender and the liquid is reduced covering the meat pieces in an aromatic thick sauce.

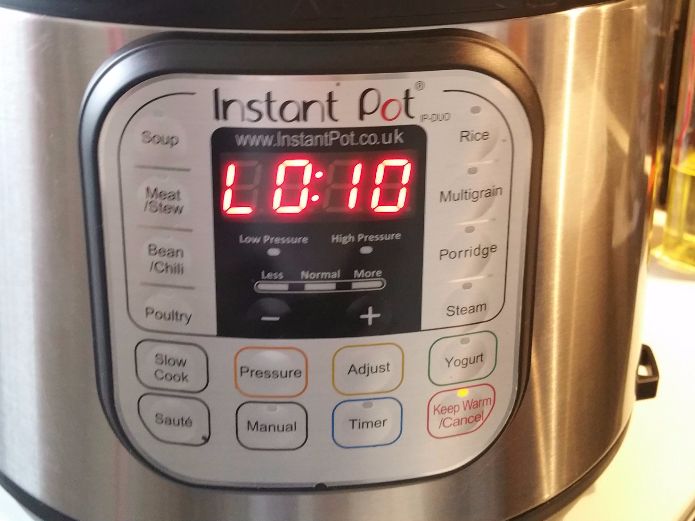
Cooking with high pressure is perfect it doesn’t require a whole lot of liquid, making it perfect for braised dishes in my Instant Pot DUO 7-1 I use or Lux 6-1 (version without yoghurt option). In comparison with my stove high-pressure cooker, where you have to manually set the timer and keep an eye on it still. The IP has automated meat/stew 30 minutes program you just press and walk away, at the end of time cancel the keep warm function so the natural pressure release can come down a bit faster (approx. 30-45 min.).

For a braised result, I submerge the meat by adding water or stock just barely covering it exposing some of the bones and meat. If you would opt for only (e.g. 50%) using half of water or stock to add, be aware that the gravy will reduce significantly as well. Tip: Keep in mind if this dish is completely cooled the gravy of the bones will be very gelatinous (jiggly as jelly). Meat jelly is another Chinese delicacy served eating it cold as homecooked food and can be creatively used in appetisers or bun fillings for example.

If I like to make a stew instead, I will submerge the ingredients covering it to ½-1 inch (1 ½ – 3 cm) above with liquid or more if it calls for a soupy consistency.


Drink suggestions:

  • Tea leaves: Green tea or Jasmine tea is very common, but Pu Erh tea has an earthy smokiness which is very pleasant with an added bonus it really cuts the fat down in your body.
  • For the beer fans: You will enjoy this dish with a light beer, a darker beer, even more, tasteful. In The Netherlands seasonal draft beer or bottled bock beer would be nice to pair along, it has richer, sweeter lager with warm toasty undertones and minimal bitterness. More information on Beleef bockbier 2015, with an overview of 125 different bock beers in The Netherlands. Besides Guinness Stout beer or a Kilkenny, share yours.
  • As for wine lovers: A red Bordeaux is an easy choice, but for the adventurous wine sleuth, an Australian Shiraz-Viognier Barossa 2006 is a discovery I can recommend. My all time favourite would be the Chilean Tarapacca Carmenere, rich in berry fruits and spices to pair with my bowl of Chinese style braised oxtail bones. You will not believe it, but I made my acquaintance and fell in love with Tarapacca in Taipei. Of course, there are far more than one grape or bottle, the more reason to cook and pair more meals.

If you have made the braised Oxtail bones, share your dinner send me a photo.

Enjoy!


Please read my disclaimer and disclosure on affiliated links and copyright notice for links and information in this post


[recipe]

Unboxing Instant Pot DUO 7-1

The latest new cooking gadget Instant Pot, is conquering a growing number of kitchen counters literally all over the world. Raving reviews from very happy home cooks, enthusiastically cooking up a storm of dishes done within 30-45 minutes.

It piqued my interest to join the newsfeed of a thriving FB Instant Pot® Community, where members enthusiastically swap recipes, share experience, find advice or search for answers. Even name their Instant Pot to rank themselves among the growing number of ‘Pothead’ owners.

One pot dinners across the oceans have never been so popular as with this latest Multi-Use Programmable Pressure Cooker. All kinds of dishes nothing seems to be impossible. Lots of talking on braised and stewed dinners, nutritious broths and test cooking of soft or hard boiled eggs.

Perfectly done with a runny yolk inside on steam for 3 minutes, added bonus easy peelable. The Instant Pot fans are going wild :-p

Unboxing Instant Pot DUO 7-1 multi electric pressure cooker

“One kitchen appliance to rule them all!” Instant Pot is a seven in one kitchen gadget that does an outstanding job. As a Pressure cooker, Slow cooker, Rice Cooker/Porridge Maker, Steamer, Sauté/Browning, Yogurt  Maker & Warmer.

“It speeds up cooking by 2~6 times using up to 70% less energy, and, above all, produces nutritious healthy food in a convenient and consistent fashion.”


User-friendly with 14 Micro-Processor controlled programs: Soup, Meat/Stew, Bean/Chili, Poultry, Sauté, Steam, Rice, Porridge, Multigrain, Slow Cook, Keep-Warm, Yogurt, Pasteurize and Fermented Rice (Jiu Niang) typical Chinese delicacy.

Instant Pot Duo 7-1 display

Instant Pot Duo 7-1 Multi-Use electrical high-pressure cooker

When Black Friday deal popped up for the Instant Pot DUO 7-1 electric pressure cooker I clicked to order. A large box within a box arrived swiftly, time for hands-on experience whether the Instant Pot DUO 7-1 truly is a real deal. Ok, right after unboxing the manual advised conducting a technical test first. Yup! it works.

Showtime had presoaked pulses at hand. During the water test, I browsed through the manual booklets and found a recipe for Black Beans soup. Followed the instructions and pushed the bean/chilli program. The display blinked the automatic time of 30 minutes, I have never cooked Black beans soup this quick from start to finish apart from lentils.

Moving on to the other pre-set programs, opted to prepare aromatic beef broth for classic Chinese noodle soup. Wow! Less than an hour. The next morning Chinese plain rice porridge under 30 minutes, niiice.

Yesterday I prepared Italian Ragu Bolognese sauce and made a rookie mistake or more an oversight. Mine almost drowned but had a good save. Food if prepared using high-pressure cooking, does not require a high volume of liquid it is closed off in a sealed pot. Therefore less evaporation than conventional stovetop cooking. To understand high-pressure cooking you can find more information by clicking this link here.

Outside the temperature is dropping and nothing can soothe the soul and tummy as homemade Chicken soup. I filled the Instant Pot DUO with the chicken carcass and beef shank bones to make a healthy Chicken broth. If you do not blanch the bones you have to brown them to bring out the flavour.

The sauté function is really an advantage great to use, browning means caramelising and that makes all the difference, without changing pans. Sauteeing the spices and bones first before filling it with water and other savourings using the Soup button (high-pressure cooking program) to cook the broth.

At the end of this program, the vegetables were added followed by vermicelli noodles then the manual slow cook button for Chicken Vermicelli Soup. Oh happy days, the Vermicelli soup sure warmed and filled our tummy’s with every slurp.

Throughout the week on a roll, testing changed into a discovery cooking tour. Trying another pulse, cooked chickpeas with the bean function for the hummus and chickpeas salad. Defrosted oxtail for a Chinese style braised recipe, which normally will take hours whether prepared in a slow cooker or in a braiser pan finished in the oven.

Nothing wrong with my slow-cooker (oval shaped ceramic pot), works perfect and doubles as serve ware. This utensil does what it says ‘slow’, speeding or fast is not required here.

slow Cooker

Slow Cooker Morphy Richardson

Back to my braised oxtail recipe, filled the Instant Pot late afternoon and the automatic stew program button with high-pressure cooking said 30 minutes, “thirty minutes?” yeah, right. Will see.

After 30 minutes the beep sounded marking the end of the program, according to the manual wait for natural pressure release then open the lid. Shut the front door! Whaddayaknow, the meat falls off the bones 🙂 Click on the link for the recipe Chinese style braised oxtail bones.

Chinese braised oxtail

Chinese Braised Oxtail bones

Darling husband requested Dutch “Erwtensoep” Pea soup made with smoked bacon and smoked sausage aka ‘rookworst’. Again pushed the soup program button, thirty minutes later after the beep. Wait for natural pressure release (NPR) do not attempt the quick pressure release (QPR) because you will have a bursting fountain which will make you cry if you just thought how clean your kitchen was.

Erwtensoep, Dutch Pea Soup

Original name “Hollandse Erwtensoep met spek & Gelderse rookworst” in English, Dutch Pea soup with smoked bacon & typical Dutch sausage “Gelderse rooksworst”

The image was taken right after the lid was removed, showing the good part of high-pressure cooking with vegetables as the main ingredients. You clearly notice that the cubes of carrots, potatoes, and celeriac (turnip-rooted celery) hold their shape while very tender and flavorous.

For me also, a first to observe green peas being very plump before turned to mush. The whole pot with ingredients was so soft, that just by turning around the spatula I could mash the soup.

The last step is to slice up the sausage and add into the pot, gave the soup a few good stirs and closed the lid back for 2 hours of slow cooking/keep warm. Not for long or hungry mouths will find their way to the pot.

The whole pot with ingredients was so soft, that just by turning around the spatula I could mash the soup. The last step is to slice up the sausage and add into the pot, gave the soup a few good stirs and closed the lid back for 2 hours of slow cooking/keep warm. Not for long or hungry mouths will find their way to the pot.

Another alluring Instant Pot feature is the yoghurt setting function to make easy and effortlessly your own homemade yoghurt. Directly in the inner port or use the rack accessory and vessels as ramekins or canning (weck) pots to make single portions.

One of the reasons why yoghurt fails to set is the undisturbed right incubation temperature, it needs to have an insulated environment like a thermos bottle or container. Now I have my appetite and eye set on to try the Instant Pot yoghurt function next to making a British Christmas pudding in 50 minutes only.

Before I would have said; “Have to see it before I believe it”. Now without a second thought saved the link to bring a merry, merry desert on the table next.


Conclusion:

Unboxing the Instant Pot, after a week using the multi electric high-pressure cooker, I am definitely an Instant Pot DUO fan. So far an outstanding performance by demonstrating its versatility to tackle an array of multi cuisine recipes. From start to finish really cutting down using high-pressure cooking time table. The dishes show moist ingredients, retaining intense flavour without losing nutrients. With a big grin, ho! ho! my last Black Friday deal is value for money.

Note: For beginners and stovetop pressure cook users, use the available Pressure Cooking Time Charts (including water ratio for grains) as a guide to prevent failures or disappointments. Possibilities are endless but not all meals are intended to be cooked with high pressure.

Update: 20th June 2017 previous resources are no longer available or maintained by Miss Vicki’s website till further notice.

For your information and more insight an overview with pressure cooking time chart links:

My Instant pot cooking journey continues on, watch for another test adventure to follow up soon.


Please read my disclaimer and disclosure on affiliated links and copyright notice for links and information in this post

Miracle loaf & bread starters

Miracle loaf recipe

My bread baking journey started off, by collecting bread recipes on the internet for the baking machine as well as traditional oven baked artisan loaves. One thing led to another stocking of different types of flour began for the preparation of various loaves of bread.

Tips of fellow bakers to use pre-mix flour jars (e.g. cheaper than buying pre-mix brands) for pancakes batters, waffles, muffins as well as bread to keep at hand.

Searching for premix recipes, I stumbled upon the famed low-calorie, high protein bread flour recipe; “Cornell bread white and whole wheat flour bread” a.k.a Dr McCay’s miracle loaf, a nutrition professor at Cornell University.

The bread with extra protein in the form of soy flour, dry milk, and wheat germ turned into a staple bread flour mix replacing white bread. View a tested white bread version recipe here for bread machine here and a Low Carb version.

I stumbled upon this bread during an internet search for our bread baking machine. The miracle loaf is a fantastic recipe, it topped my favourite for weekly loaves of bread feeding our family.

Starters: Biga, poolish, sponge

Alternating between wholemeal, whole wheat or rye flour bread I moved on with healthy seed bread or sweet bread to keep everyone happy. The next step was making bread with pre-ferment, which is a fermentation starter an indirect method in bread making also called as ‘mother dough’.

Big fans of focaccia and ciabatta, both loaves of bread have a distinct flavour and texture with lots of airy holes. You must start with making a starter called biga (poolish and sponge are more or less the same being more watery compared to biga which is drier).

For Ciabatta you have to prepare the biga one day earlier to become active and for the dough to rise after mixing and kneading. When it has bulked up it is a soft wet dough quite sticky to handle and creates a sloppy shape in the form of a slipper, giving the Italian name for this type of bread. The French have their baguette, the Italians have Ciabatta, both great breads.

Sourdough starters

Progressing on, attempting to start a wild yeast sourdough starter which became a challenge, my earlier attempts failed due to surroundings and circumstances resulting in high acidity, mould or not active.

The quote is “As long as the starter is properly fed and cared for, it can be kept active for years to provide predictable results over and over again.” I started preparing two sourdough starters, one made of 100% Rye and the other entirely based on wholemeal.

Used the tried and tested recipes of Weekend Bakery Rye sourdough starter in easy steps and Sourdough home Mike’s old way sourdough starter with wholemeal flour.

Rye sourdough starter

Feeding Rye sourdough starter

After the first day nothing much happened but after the next 12 hrs, the wholemeal starter became active with small bubbles appearing on the surface. For the Rye starter, it took a bit longer 24 hrs to show activity, now both starters after each feeding and rest are doubling in volume with nice airy holes and bubbles.

Repeating the feeding cycle, from the images it appears as if the wholemeal starter doubled more. From the beginning, I have maintained the rye starter thicker but when stirring it feels like a light paste, after the third day discarded 2/3 before feeding and should have doubled the flour and water from 30 gramme to 60 gramme but I totally forgot about it. So I couldn’t take a cup of starter without almost cleaning out the jar.

Wholemeal sourdough starter

Wholemeal sourdough starter

Now five days have passed, both starters doubled consistently with loads of air bubbles. What might have been a factor aiding the progress is the weather temperature rising as well. Most likely making it a better environment for the wild yeast to latch on I suppose. The wholemeal starter I fed today with all-purpose flour according to Mike’s instructions to stop further development of micro-organisms in the starter.

Sourdough starters Wholemeal & Rye

Sourdough starters after one week (l) Wholemeal flour (r) Rye flour

Tomorrow both starters will be a week old and should by now become stable, one thing is for sure they both have developed a nice fruit, lightly vinegary smell. Will give it a day or two more to start preparing the first sourdough bread and most likely I can even use the discard for other purposes as well. I’ve found a very nice recipe for sourdough pancakes with discarded starter to try out soon.

Sourdough hydration level

Having viewed a lot of recipes, you can not miss the remark on the hydration level of the sourdough starter or the reference to the percentage. In the beginning that sounded like abracadabra to me, to help you some of the websites even include a calculator. Looking at the charts it only confused more, in fact, what it means is the percentage of water compared to the amount of flour, bakers refer for this reason to the flour weight as 100%.

I’ve found this reply helpful and explanatory on Sourdough.com forums:

For example, 100% hydration starter means a starter that has equal weight flour and water, 50% hydration would be half the weight of water compared to flour.  eg 50g flour and 50g water  = 100%, 100g flour and 50g water = 50% hydration starters.

Always take the flour weight as 100%, so if your dough recipe uses 500g flour and you want to make a wet ciabatta like dough, your hydration will be approx 80%, this means 80% of the flour weight (500g) will be how much water you add.  In this case, it will be 400g water.

The higher the % hydration the wetter the dough or more liquid the starter will be. Generally speaking, wetter doughs will also have nice big holes in the crumb, and drier/firmer doughs with lower hydration will have a closer more dense crumb.

If you are curious to learn more about this, here’s a list of resources and communities which I found very helpful on information, recipes and support;

Bread baking journey & starters continued

Next will be keeping the sourdough alive for an ongoing period of time.  Watch out for my next sourdough bread update, but have a look at my Ciabatta bread and recipe coming next.

Bread baking journey & starters

Baking is a lot of fun, tasty and rewarding, started in my teenage years experimenting with my first buttery dough for mini-croissants. Hard work paid off in folding and rolling the dough delivering the first batch of mini-croissants.

Over the years I collected, tried and tested favourite baking recipes, but sadly lost that first pastry book. Next to books, through the Internet, I’ve found new resources to follow.

Always interested how others use, re-invent or share their new adaptations on classics, creative ideas or find new inspiration. Here I am sharing my go-to resources, tried and tested recipes, bloggers and favourite reads.

Bread baking


While my original recipe disappeared here’s a good Croissant recipe with a step-by-step guide, have a look at Izzy Hossack “How to make Croissants“. I really like the use of animated.

GIF feature delivering a hands-on look in her blog post, the moving frames draw immediate attention following her actions. Another choice is Classic Croissant article posted on Fine Cooking, which resembles very much the recipe I used for the very first time preparing the buttery dough.

Making the buttery dough gave me a buzz, but heaven knows what I did next with the Dutch recipe for soft buns. After proofing and rolling, the buns didn’t rise as it should have according to the recipe instructions. The end result after baking was disastrous, even a bit warm it was hard to chew.

Once cooled down the texture changed the buns into stones, two dozen of cobblestones bread even the dog couldn’t bite through. We had a big laugh and the mishap only made me more persistent to keep trying, learn more techniques and secrets to better eats.

The best is actually food talk; coffee chats, swapping of recipes, sharing potlucks and dinner stories :-). You will notice, food talk is a common thread running through al my conversations and postings.

The real bread making started seriously when we moved to Asia, once settled and fully adjusted we still were missing the taste of crusty European bread loaves.

Come to think of it, travelling brings forth a longing to comfort food, thinking of food can make you salivate and the craving sparks a quest to recreate that particular dish or flavour.

Depending on where we were living it meant going on the hunt to find the ingredients, sources or find substitutions which at times were even better than the original. The exchange of information brings a whole circle of communication around, joining into a new network of the circle of friends.

Bread baking journey & starters

Baking Equipment

Back to bread. By chance, we received a bread baking machine in Taiwan from friends who were leaving the island returning back home. At the time these baking machines were not widely available yet in The Netherlands.

A huge square box, but after our first bread bake trial it was a done deal. The bread machine is a keeper. The smell of fresh baked bread is so seducing it makes your mouth water and a good belly rumble. We grew up close to a bread bakery literally down the street in our hometown.

Until the bread baking machine sound whistled after the kneading and 2nd rise, signalling the baking phase entered. Precise from that moment slowly emanating the olfactory aromas of baked bread changing the house in a tiny bakery. The tempting smell literally draws the whole family into the kitchen anticipating for a fresh slice of fresh bread.

For more on my favourite power hub and tools read my “Kitchenaid 5 Quart Plus Series post.  For the heavy duty kneading cycles and baking with the  Panasonic Inverter microwave oven both did a fine job.

At present, I am using a Miele oven for artisan bread and volume, the bread baking machine mostly during the week since it only can produce one loaf per baking cycle. The Breville BBM300 still works like a charm but newer and far more advanced models are now on the market.

Lastly, a Magimix food processor 3200XL for all other pastries and food recipes. Along the way, I will mention other versatile suitable gadgets for certain tasks or just making it more fun.

If you are contemplating the purchase of a bread machine, I’ve listed a few sources for general information.

Making bread and pastries you can use wet fresh yeast or dry yeast in active dry yeast and instant yeast type forms. The purpose of yeast:

Rising the dough – yeast fermentation makes carbon dioxide, a gas responsible for stretching and expanding the dough like a balloon.

Dough development – other compounds formed during yeast fermentation make the flour stronger so it can capture and hold the carbon dioxide gas that the yeast produces.

Flavour, aroma and texture – yeast fermentation also provides these wonderful sensory and physical attributes that you expect from yeast-raised products.

You need yeast to make bread, but you can also make your own bread starters and use both for a sourdough bread. Our next topic coming up:

Bread baking journey & starters continued:

Miracle Loaf & bread starters

My bread baking journey started off, by collecting bread recipes on the internet for the baking machine as well as traditional oven baked artisan loaves. One thing led to another, thus the stocking of different types of flour began for the preparation of various bread. Even combining of various pre-mix flour jars (e.g. cheaper than buying pre-mix brands) for pancakes batters, waffles, muffins as well as bread to keep at hand.

Searching for premix recipes, I stumbled upon the famed low-calorie, high protein bread flour recipe here.

Oatmeal in Granola out

Huge fan of super oatmeal cookies, I always stock a bag or two in our pantry if not for cookies than it would be porridge or yoghurt-muesli for breakfast. Crazy enough if you buy Granola or Muesli bars as a healthsnack in between meals, your often to be disappointed being overly sweet. If you want to keep your sugar intake and make fibre and proteins your best buddy you have to check the ingredients list, without accidentally crushing down the health factor.

For weeks a pack of oatmeal was screaming ‘healthy & nutritious” from the kitchen counter, yesterday I did just right for the cookie jar. While preparing Ciabatta bread and feeding my sourdough starters, in between I just threw al ingredients together in a bowl for Home-baked Granola bars! (A short video will be added later to show how easy it is to mix everything together, the sound needs to be re-edited first)

In all fairness I have tried quite a few recipes but the bars keep falling apart, leaving me with more muesli crumbs than bars. Dozen attempts later and building up annoyance I found out by coincidence how to guarantee to make packed bars. While preparing the oatmeal layer in a brownie pan which I first lined with waxed baking paper (cut larger size than the pan), fold down the excess wax paper and press down with another brownie pan use a heavy object, but bodyweight should do the trick. Press the mixture evenly and surely sticking it all together. Don’t over-bake otherwise they’ll turn out as bricks, your teeth won’t like it but our dog did (at least somebody was happy with my mishaps too 🙂 )

Granola bars

Granola bars for the cookie jar or tin

As for recipes ingredients some extra steps, toast your nuts for extra crispiness. I prefer to use honey, maple syrup and consciously try to avoid those which uses (high-fructose) corn syrup, there is a difference between corn syrup and High-fructose corn syrup. Ever since I was drawn into a discussion about high fructose corn syrup I learned more about this topic. The main concerns centres around excessive sugar intake and its contribution to obesity, type-2 diabetes, metabolic syndrome, and cardiovascular disease (source: Wikipedia). Read for more information the highlighted article links posted on Eco-watch and Huffington Post “Why to avoid intake or using high-fructose corn syrup at all”.

Granola bars cut when cooled down completely

Granola bars cut when cooled down

This recipe is my basic go-to, all ingredients can be replaced or substituted with almost everything. In the images shown here I’ve used dried sultanas and raisins, during other bakes I’ve used cranberries, blueberries, dried orange peel and the list goes on. The same for the nuts, although peanuts and almonds are most used basically a combination of various seeds or a mix combined with nuts. As for the binding liquid I used vegetable oil, honey and vanilla essence. Use at least two or three dried fruits otherwise the sweetness will drop and you’ll have to add sugar for balance, which isn’t necessary. Again press it down firmly.

Binding liquid; vegetable oil, honey and vanilla extract

Binding liquid; vegetable oil, honey and vanilla extract


[recipe]


#1 Asian Cuisine Wine Book favourite

With four Masters of Wine now living and residing in Asia, the first person to receive Master of Wine title was Jeannie Cho Lee MW. She is an award-winning author, television host, editor, wine critic, judge and educator based in Hong Kong.

Her pioneering #1 Asian Cuisine Wine book Asian Palate book 2009, explores wine and Asian food pairings. It has won many awards, including the Gourmand Award for Best Food and Wine Pairing Book in the World in 2010.

Her second book, Mastering Wine for the Asian Palate (2011), introduces a new set of Asian wine descriptors for major grape varieties and wine styles.


Visit her website Jeannie Cho Lee where authentic Asian Cuisines and wines are celebrated together; mastering wine, food trends, pairing guide and taste notes database are just a few highlights.

 "Savouring Asian Cuisine & Wine" by Jeannie Cho Lee MW

Asian Cuisine and Wine book favourite; Asian Palate by Jeannie Cho Lee MW

Jeannie has developed an Asian-oriented Food and Wine Wheel with wine recommendations for various southeast-Asian cuisines, which I ordered online directly through Jeannie Cho Lee website.

I genuinely can recommend her first book based on 5 valuable reasons. The content is exceptionally informative about the pairing of Asian cuisines with old and new world wines.

Reason #1 Asian Cuisine Wine Book

Why? It definitely is a first book, where Asian ingredients and terms are truly introduced to the language of wine.

The popularity of Asian cuisines rising up all over the world from fine dining to trending street food restaurant and food truck outlets. The use of typical sub-tropical ingredients showcasing native dishes.

A lot has been written and said about wine pairings with Asian cuisines, but never from an Asian point of view.

Reason #2 Focus on Asia

The Asian perspective, this book brings a wide-angled view focusing on Asian cuisines mentioning specifically ingredients in dishes and cooking styles.

Typical native ingredients tied to Asia which you will not come across Europe or other Western parts of the world.

Reason #3 Demonstrate dishes and considerations

Illustrating regional cuisines with wine consideration, recommendations and what to avoid. This by itself is significantly refreshing, instead of the boring and copied standard advice to choose for the outdated choice of sweet wines.

Reason #4 Eye seduction

Important to realise, as the wine is approached by appearance, nose and taste, the visual value is made by alluring food photography.  In effect seducing the eye and wetting the palate.

Appetising food photography of wine and Asian cuisine, along with snapshots of the location and introduction of the regional or national cuisine.

Reason #5 Asian Cuisine Wine book

Not the last or least reason, the value, this should have been on top but then it wouldn’t make any sense without the introduction. The western approach is often to match one wine with one dish, this is difficult in reality with food served on the Asian table.

A simple bowl of rice is often accompanied with at least 10 different dishes in Korea. A humble Chinese meal at least with 2 dishes and a soup not counting the small sides or a festive banquet dinner of many courses.

While a perfect pairing between an Asian meal and wine is often possible, Jeannie has identified among Asian wine and food lovers four key consideration: –versatility, umami character, intensity and quality – when matching Asian cuisines and wine. Jeannie Cho Lee MW.

Singapore is highlighted featuring the national poultry classic dish, here’s my Hainan Chicken post with the recipe. Or click for Thai famous beef salad Yum Nuea instead.


food and wine wheel - Asian Palate

Food & Wine wheel

She also collaborated with the German Wine Institute, launching the 52-page book in November 2011, for a full read here’s the article link: “Perfect Pairings: German Wines and Asian Flavours“.

The German Wine Institute Dutch brand office hosted a book launch event held in Amsterdam where Jeannie presented the book during luncheon with Dutch-Asian Chefs and Restaurateurs. I stumbled upon this online Dutch review article  Smaak van Wijn (Dutch readers only, no translated transcript).

For more information on how to obtain a book copy, visit the German Wines website. The site also offers an online shop with interactive web-based food and wine pairing tool with other helpful accessories.

Most importantly it has tonnes of information how to discover, experience and enjoy German Wines with wine travel tours and tips.

A video impression, watch The Deutsches Weininstitut (DWI), German Wine Institute


Rocky Road treats

Over time I have enjoyed many styles of Rocky Roads prepared with various ingredients, you’ll often see recipes named as bars, cupcakes, brownies, fudge or ice cream flavour. A treat very popularly among our British, American and Australian friends, it is a dessert as well as a snack and ice-treat. Rocky Road basic recipe consists of chocolate, marshmallows, nuts, dried fruit first, filled with all other kinds of confectionery ingredients or personal favourites.

Rocky Road treats style ingredients will tell its country origin, the basic ingredients always include marshmallows, milk chocolate mostly (but dark and white chocolate are used too);

  • Australian version you will find; desiccated coconut, peanuts (mostly, but other nuts too), glacé cherries or Turkish delight (or other fruit jelly-like ingredient).
  • British version you will find; biscuit, raisins/sultana’s with a light dusting of icing sugar on top.
  • American version you will find is with almond or walnuts, but most often in ice-cream form. If you like here’s a great Serious Eat’s Rocky Road ice-cream recipe.

In my Rocky road recipe version, the following ingredients of walnuts, cranberries and a nice pinch of cayenne pepper to add some heat, pairing it very nicely with dark chocolate. You will not complain if this in your lunch box, served with coffee, High tea or even with a beautiful glass of full-bodied deep red wine.

Rocky Road topped with crunchy walnuts sprinkles


For the Rocky Road Recipe just click here, on the recipe page you will find the recipe box with the English version and in the text below is a Dutch translation.

Watch for my next Rocky Road fudge recipe to be uploaded soon.

Rocky Road treats

Filled with marshmallow, walnuts, cranberries, covered in dark shiny and smooth chocolate

Rocky Roads recipe

us flag icon   Rocky Roads recipe in English, just scroll down to the recipe box and more on Rocky Road treats here.

For information on how-to temper chocolate video English version.

My friend’s daughter is leaving home very soon for study abroad and as a gift, she wants to give her daughter a cook book in native Dutch language. Filled with many family and friends recipes of international dishes as a reminder of home-cooking; comfort food to enjoy and share with her new friendship circle.

I shared my version of Rocky Roads recipe which I have prepared for her mum in the past and often bring this as a food gift along as a nibble on various pot lucks or tastings. Rocky Roads are always a great success among chocolate lovers. Therefore the recipe hereunder is a Dutch translation as in the recipe box.


nl Rocky Roads recept  – Marshmallow chocolade-noten rotsen

Ingrediënten:

  • 350 gram pure chocolade (melkchocolade of mix met puur en wit) grof gehakt of je gebruikt chocolade druppels) ± 2 koppen.
  • ½ kop mini witte marshmallows
  • ½ kop mini roze marshmallows Geen mini, dan grote fijnsnijden in mini dobbelsteentjes
  • ½ kop cranberries (optioneel) i.p.v rozijnen, sultanas of andere gedroogde vruchten
  •  ½ kop geroosterde walnoten grof gehakt, houdt 2 volle eetlepels apart voor garnering
  •  Optioneel: 1/4 – 1/2 theelepel cayennepeper of chilipeper vlokken

Voorbereiding:

1. Magnetron kom, brownie pan, bakpapier, siliconen spatel, thermometer

2. Indien nodig marshmallows fijnsnijden in dobbelsteentjes, apart zetten

3. Grof gehakte walnoten even roosteren in een koekenpan, tot dat ze een mooi goudbruine kleur krijgen en knapperig wanneer ze afgekoeld zijn.

Naast geroosterde noten kun je het nog lekkerder maken met een krokant suikerlaagje. Ik heb knapperige gekarameliseerde walnoten gemaakt en doe hier bereidingsrecept als variatie erbij:

Benodigdheden: 1 kop walnoten, ¼ kop suiker, 1 eetlepel boter (extra toevoeging: kaneel mengen door de suiker).

Bereidingswijze: Alles tegelijk in de koekenpan toevoegen, zodra suiker begint te smelten blijf het geheel roeren en wentel alle walnoot-stukjes erdoor. Zodat alles is bedekt met een mooi gesuikerd laagje. Dan gesuikerde walnoot-stukjes verspreiden op bakpapier en af laten koelen. Gebruik de helft voor dit recept en bewaar de rest voor de volgende bereiding of bij andere bak recepten, salades etc.

4. Chocolade blok grof hakken of als je aan chocolade druppels kunt komen dan gewoon gelijk in magnetron kom doen.

5. Knip bakpapier iets groter dan de brownie schaal zodat het een opstaande rand heeft.

6. Temperen van chocolade, dit zorgt voor een mooie glans en krokantheid. Pure chocolade smelt je op 45 à 50 °C. Je laat het afkoelen tot 38°C, doet de koude stukjes erbij en eindigt rond de 31 à 32°C. Op die temperatuur is de chocolade klaar voor verwerking.

Let op: temperatuur verschilt bij verschillende chocolade soorten! Wil je er meer over weten bekijk dan deze video link van Njam “Tempereren van chocolade

Bereiding:

1. Temperen van chocolade als je het voor de eerste keer gaat maken, houdt een voedselthermometer bij de hand. Bekijk de video link voor informatie en instructies.

2. Voeg de grof gehakte chocolade of druppels in een magnetron schaal en zap 1-2 min. (900 watt liever korter en nog een keer, dit om te voorkomen dat chocolade verbrand!) Zodra je ziet dat de kern al gesmolten is dan flink roeren met de siliconen spatel door de restwarmte smelt de rest vanzelf en koelt het ook enigszins af.

3. Als het een mooie glanzende massa is geworden voeg je alle andere ingrediënten erbij, alles goed door elkaar mengen.

4. Optioneel: een snufje cayenne-poeder erbij, dat combineert heel mooi met chocolade. Het geeft het net een beetje pit, zonder pittig te zijn.

5. Giet de Rocky Road mix in de brownie pan, strijk het enigszins glad en strooi de laatste 2 eetlepels gehakte walnoten als garnering erboven op. Laat het afkoelen op kamertemperatuur of 25-30 min in de koelkast.

6. Afgekoeld omkeren op snijplank, verwijder voorzichtig bakpapier en snij in mooie vierkantjes. Klaar om te serveren of weg te geven.

Tip: De chocolade kruimels wat op de snijplank achterblijft niet weggooien maar doe het lekker bij de koffie of bij warme chocolademelk erin. Errug lekker :-p

[recipe]

Spring budget beauty picks

Beauty pick brow gel

Julep’s Don’t Leave Your Brows at Home $24

Beauty picks a nifty brow gel

Read more: Spring’s Best New Beauty Launches for Every Budget http://news360.com/article/287048235

Sculpting your brows with a Gel tool that transforms with a shadow effect. Just nifty this new Spring beauty product by Julep’s Don’t Leave Your Brows at Home, $24
I am an eyebrow fan, love to shape my arches with powder, pencils, gels using my hand or stencils. This is a new hybrid powder and brush duo, a two-in-one make-up tool. Where you dip the soft angled brush into the cap and in a few strokes you easily shape and fill in your brows. My new makeup brow gadget to have and to hold, yours too.

The new brow tool comes in an extensive array of natural shades to match various skin tones and hair color. Here’s Julep’s blog post link with a handy Brow color chart to find your perfect match.

Chinese Top Chefs “modesty is a virtue”

For Chinese Top Chef’s “modesty is a virtue”, this is a high-minded and  a traditional behavior in Chinese societies. Celebrities Chefs who gained fame in the West through cooking tv shows are Ken Hom, Martin Yan, Kylie Kwong and Ching He Huang. And let’s not forget the productive and outstanding Chinese cookbook author; Deh Ta Hsiung just to name a few. But when readers are asked to name present Chinese Top Chefs in China, or a Chinese Top Chef nearby not much is known initially. With the aid of foodies culture, international awards and worldwide acknowledgements of International famous peers, public awareness is growing.

A wind of change is cooking up a storm of transformation with new Top Chinese Chefs gaining recognition and they are turning heads with creativity, combination of East meets West, high skills and innovation. In The Netherlands, The Hague well known Chef Han of Restaurant Hanting in BeiJing Chef Executive Chef Da Zhenxiang of famous Da Dong Restaurants two names and places on opposite sides of the globe.

“You cannot learn about Sichuan food in Beijing because it tastes different,” he says. “You have to go to Sichuan to taste the authentic food. This period was very tough because I only earned 19 kuai [a colloquial term for the yuan] each day and had to work hard to clean the kitchen, and buy presents for the sifu [master], hoping they would teach me something.”

While chefs such as Heston Blumenthal come to his restaurant to learn how to make Peking duck, Dong also spends time in other kitchens to pick up new skills and ideas. He spent a year learning French cooking techniques at the Maxim’s de Paris restaurant in Beijing.

In August, he went to Mongolia in search of wild mushrooms for new dishes. “The mushrooms naturally grow in circles in the grass, so I was inspired to also present them this way on the plate with flowers,” he says.” This article was first published in the South China Morning Post, to read more click on the linked article(s).

via Top Chinese chefs shun the spotlight | South China Morning Post.